Power Query: fix your data warehouse date table blues with these tips
Date table doldrums
While traditional SQL databases set column types for you, databases which use unstructured sources, like Snowflake or data lakes, do not.
I love getting date tables from data warehouses.
I don’t love manually setting data types, renaming columns, and turning off default summarization for these columns. In this post, I use the ribbon and buttons for doing most of these things, and I use some custom M when needed to speed things up.
Date tables have many date columns: start of year, end of year, start & end of quarter, month, year— to name a few. Ideally, we get the date table from a corporate data warehouse, so that it includes the organization’s fiscal calendar, holidays, etc. When detecting data types from certain data sources, Power Query may set everything that looks like a date to date/time instead of date.
There are also plenty of number columns in a date table: date id, day of week, canonical week id, month id, year id (these are all indexes of the time period named). All of these numbers are integers, but Power Query types them as decimal, or more specifically as “number.” Generally, I’ve taken two approaches to changing these column types in the query editor. Either I set the type for each column or I hold down the control key and select 4-5 at a time and use the Transform menu to set the types, working from left to right as I go. Either way, changing column types manually is tedious.
What about Table.ColumnsOfType() function?
I’ve long wanted to use the M function Table.ColumnsOfType, but it didn’t seem to find the columns.

Insert step after. Table.ColumnsOfType(#”Previous step name”, {type datetime})
I tried Table.ColumnsOfType(DATE_DIM_Table, { type datetime}). This looks at the table in the first parameter and checks it for a list of types. However, the list of columns of type datetime is empty.
Having found an article about this function by Lars Schreiber (Pitfalls with Table.ColumnsOfType | THE SELF-SERVICE-BI BLOG (ssbi-blog.de) ), I returned to the navigation step and inserted a new step before Custom1. This will break the Custom1 step, but I’m getting information.

With Table.Schema we can see the types of each column. What’s important is the highlighted column, IsNullable.
Just as Lars had described in his blog post, the columns are nullable. Knowing this, we can delete our Custom2 step and specify nullable types in our Custom1 step. Because nullable datetime is not exactly the same as datetime, it caused the function to return no columns.

Table.ColumnsOfType(DATE_DIM_Table, { type nullable datetime}) returns a list of 20 columns (7 shown)
Now that I have a list of all of my datetime columns, I’ll go up to the previous step again to generate a Table.SelectColumns formula.
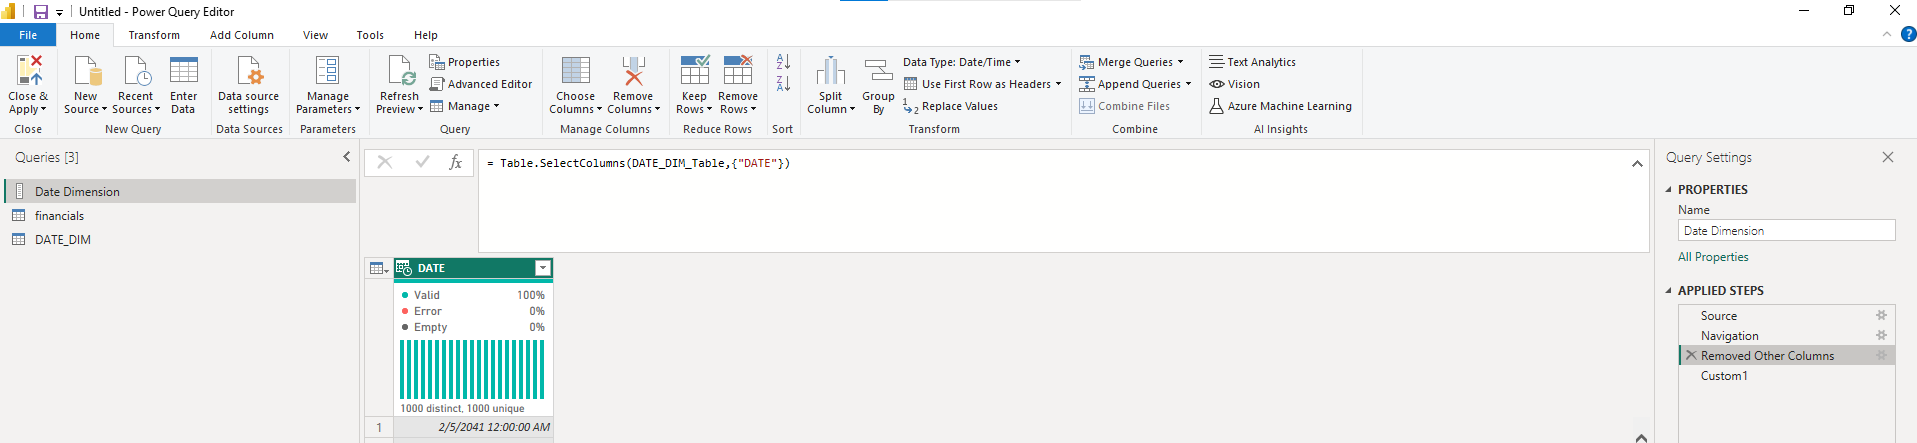
I clicked on the Navigation step, then I right clicked on the date column to remove other columns, which generates a Table.SelectColumns formula.
Table.SelectColumns takes two parameters: a table and a list of column names. The first parameter, DATE_DIM_Table is the name of the previous step (it’s name is hidden in the Navigation step). The second parameter is a list, marked by curly brackets and including the name of the “DATE” column only.
We will paste the formula from the Custom1 step where {“DATE”} is in the Removed Other Columns step.

Actually, we needed to update our formula to make sure Table.ColumnsOfType referred to DATE_DIM_Table.
To set column types all at once, I clicked in the preview results and hit Control-A to select all. Then I went to the Transform tab of the ribbon and set the data type for all selected to Date.

The M generated by changing the type has an input table. The whole input table is enclosed in curly brackets and each item is two items enclosed in curly brackets: column name in quotes and the data type.
Dates now have the correct type, but are missing our other columns, like month name and day of the week. We can get them back by deleting the Removed Other Columns step. The Changed Type code explicitly refers to each column name changed, so deleting the previous step will not break anything.

All columns are back. Date columns are now date type, as seen by the calendar icon instead of a calendar with a clock icon for date/time. I also deleted the Custom1 step to clean up.
Let’s streamline: how about decimals to integers?
First thing to know is that the type we’re looking for is “type nullable number”. I’ll add that as a custom step.
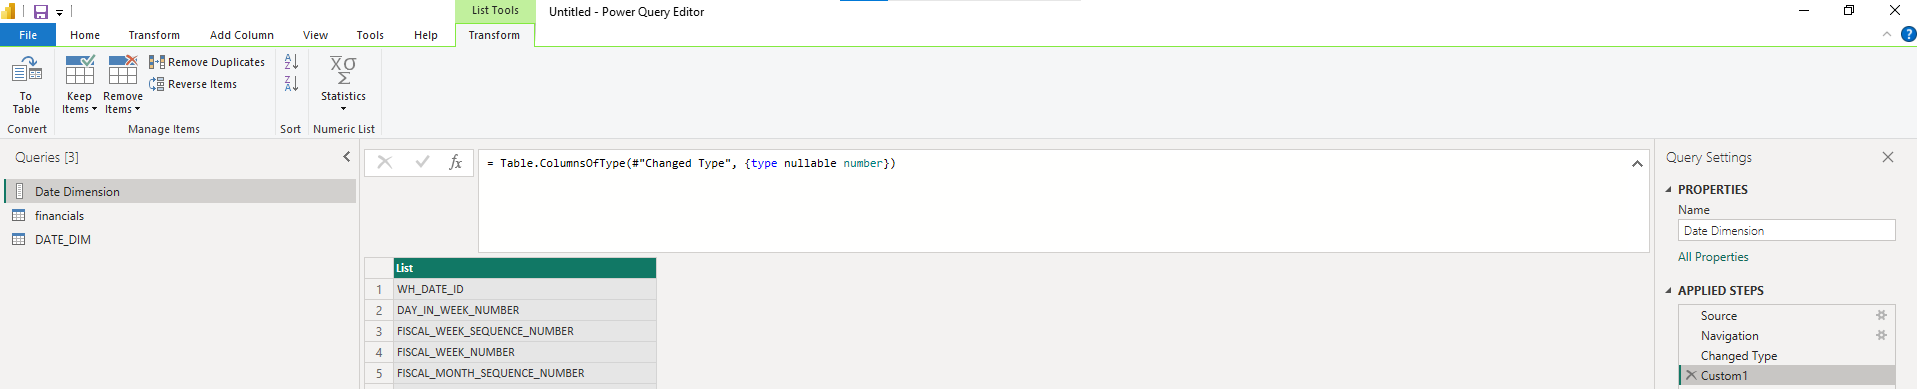
Table.ColumnsOfType(#"Changed Type", {type nullable number}) brings back 27 columns.

Instead of adding a step, I put a Table.SelectColumns(#”Changed Type”, in front of the formula with a parenthesis at the end. Keep columns of type nullable number.
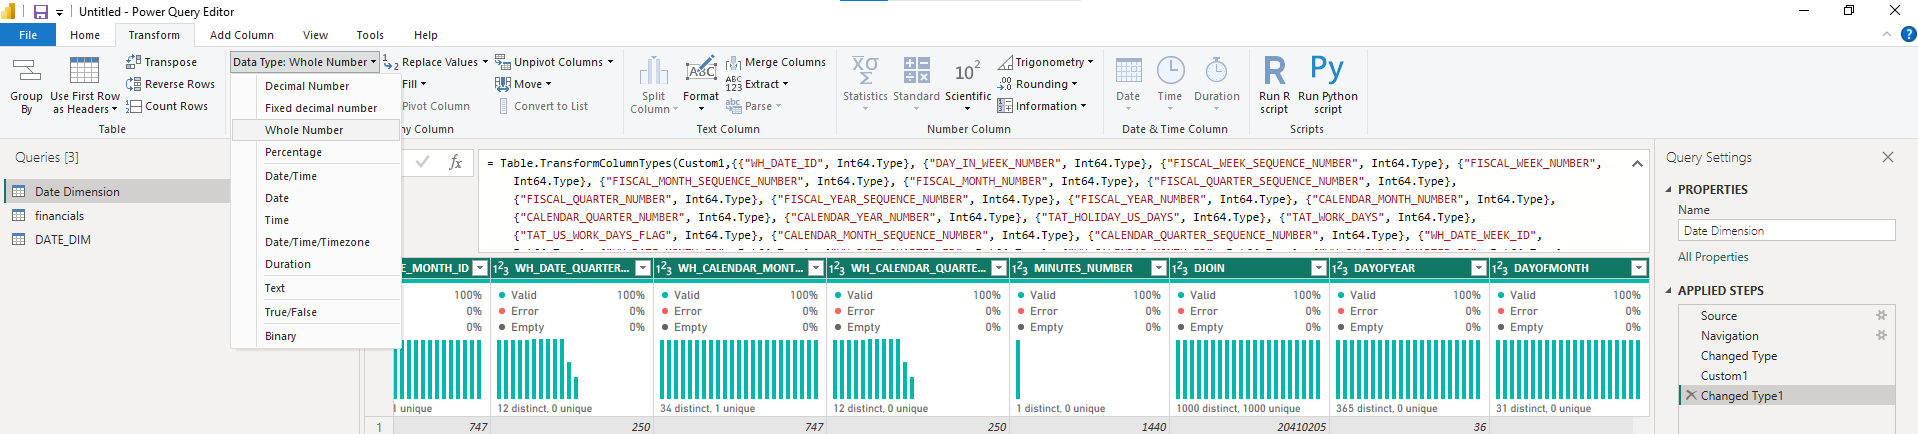
Same trick again. Select all; Transform ribbon; Date Type: Whole Number.
Delete Custom1 to get back all of the columns. Dates are dates and numbers are integers.
Fix column headers so not all caps with underscores
As a final cleanup, I want to rename the columns. I have a handy function, which you can use. Paste the text into the advanced editor. Rename it FixColumnNames so that it can be referenced.
= (tableName) => let
Source = tableName,
Custom1 = Table.TransformColumnNames(
Table.TransformColumnNames(
Table.TransformColumnNames(
Source,
each Replacer.ReplaceText(_, "_", " ")
),
Text.Proper
),
each Replacer.ReplaceText(_, " Id", " ID")
)
in
Custom1
There are 3 levels of TransformColumnNames in this function. The innermost changes underscore to space. The middle one changes case from upper to proper. The outermost changes “ Id” to “ ID.” Results: DAYS_IN_WEEK becomes Days In Week. DATE_ID becomes Date ID. Review results to make sure they are what you need.

Voila! Easy peasy. You can edit the transformations to suit your purposes.
Set default summarization for date columns.
One last task awaits: setting default summarization for date columns to None. Because of recent improvements in Power BI Desktop, you can now right click on a table name and select columns in the Model view Data pane. Then, under advanced in the Properties pane, you can set to Summarize by: None. This way, if you put month numbers on a visual, they will act as an axis or coordinate and not automatically sum.

The last thing you should do when bringing in a date table from a data warehouse is to set sort order for Month Name and other fields so that they sort by a number field, like Month Number. Otherwise, April, August, December will come first. Microsoft has setting column sort order in Power BI Desktop documented nicely. The only way to do this is one field at a time, but hopefully, you’ve saved enough time with renaming columns, setting column types, and turning off summarization of numeric fields.