Web Scrape Multiple Columns - Power BI Obit Checker
A few years back I created a Power Query file to check local obituaries. At that time, the obit website used an API which was exposed in the URL. At some point, the website was updated to be less transparent about its methods, but I can still get some info from it.
What’s the use case? When I was in college, the alumni department would read the daily paper cover-to-cover looking for stories about alumni. This could be used as an automatic double-checker for obits, where it would compare first and last name to first and last name in a database. Maybe you’re a member of a tontine, like the Flying Hellfish, and want to be notified as your cohorts pass away. Or maybe you just want to see how it works, that’s fine too.
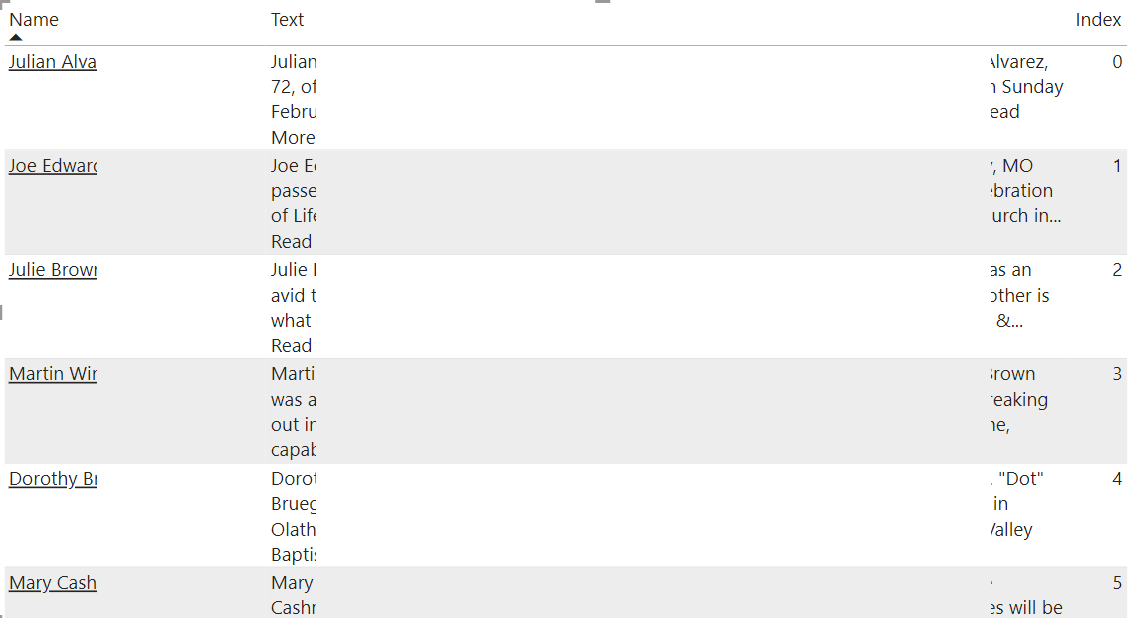
Here’s what I’m building. A table with 3 columns: Name, Text, and Index. The fourth column, Link, is an html link to the full obit, and I’ve linked the name column using conditional formatting. I like the index because it keeps the original order, most recent on top. I’ve clipped the screenshots so you don’t see full names.
Let’s get some data from https://www.legacy.com/us/obituaries/kansascity/browse.
In Power BI Desktop, Get Data> Web. Then paste in the URL.
The web connector interface displays. We want the button in the bottom left: Add Table Using Examples.
![Web connector interface. List of suggested tables [8] on left and 2 Text options. In the middle are Table View and Web View tabs and a message saying No items selected for preview. Ignore all this. We want the button labeled Add Table Using Examples.](https://images.squarespace-cdn.com/content/v1/61a6ed66daa4ac3709067d93/8b893ee7-b7ed-46aa-98f3-ad08779271b6/add-table-using-example-3.png)
Below is the Add Table Using Examples interface. The website is in a window at the top and you can scroll up & down to see what you need from the site.

Below the site preview is a place to type sample data. I started with name, typing the first 2 or 3 names I saw and then picking the dropdown values that matched simple name, and I typed Name in the column header.
Then, I used the plus button to the right to add a second column. I typed names again, but this time I picked the text preview for the person and named this column Text.
Using the plus button again and typing the name again, I picked the value that has a relative web path, beginning with /us/obituaries/…
Below the first several rows in black that I’ve provided are rows in gray that have been automatically filled in. It’s a good idea to scroll through those to be sure they look right.
Then, I clicked OK which took me back to the previous screen and I clicked OK again.
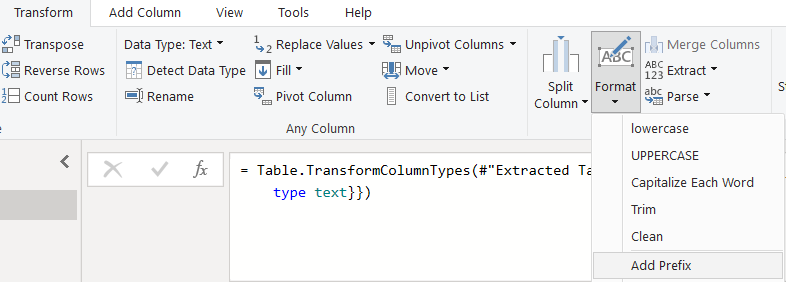
In the query editor, I added the prefix to the Link column to turn it into an absolute URL. From the Transform ribbon, Format: Add Prefix: https://www.legacy.com.
This is the main work of getting the info. There are a few steps in the query to extract the first and last name, avoiding suffixes like Jr. and III. Getting first and last name enables me to compare it to first and last names from another database. I merge the two tables using Left Outer Join on First Name and Last Name. Fuzzy match is possible or exact match depending on how big the database of names is. Then I can filter out everything that doesn’t match.
Here’s the file. Let me know what you think.