Filter by Excel or SharePoint list to make the server do the work in Power BI Desktop

My Zoom background desk.
When working with large tables with lots of rows, it’s best to filter data to what’s needed. Some teams need to filter this data using lists because no existing category will work. Often, people will filter their data by merging their data warehouse data with a list that’s from Excel or SharePoint Online. You could call a list like this a control table.
Merging different sources, however, means that the data warehouse can’t do the work, so Power BI has to do the heavy lifting. Power BI is not as fast as data servers are. Making the server do the work s what Microsoft calls query folding. I was SUPER excited to see Alex Powers demo a way to do this using ONLY the buttons with no coding. I realized later that he was demoing Power Query online 🙁 and not the query editor in Power BI Desktop. If you need to do this in Power BI Desktop now, you’ll need to make do without the fancy interface.
Here are my steps for making the server do the work instead of Power BI.
Our goal is to filter database tables using a list from Excel or SharePoint.
In the following example, there are tables for Employee and Sales. These data tables typically come from a data warehouse. EmployeeIDFilter is a control table. This would be brought in from Excel or SharePoint Online. My tables are contained in the report itself for demo purposes.
Query editor with Employee, Sales, and EmployeeIDFIlter tables shown.
EmployeeIDFilter is in italics because load is disabled, and it won’t load directly to the report.
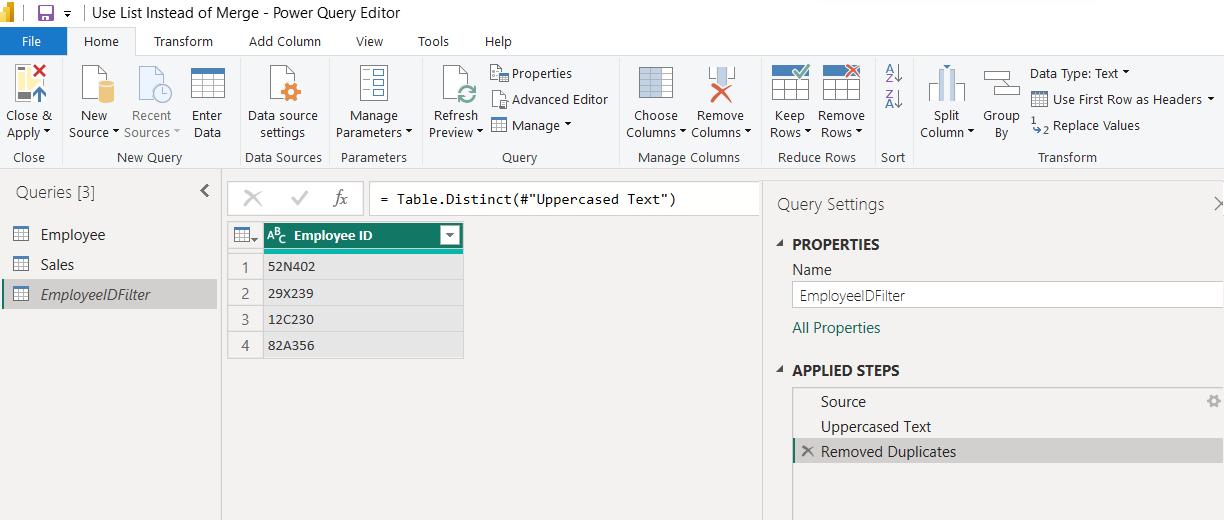
When getting data from Excel or a SharePoint list, I will make sure that formatting is consistent: Uppercase, trim to remove extra spaces, and remove duplicates. This is sanitizing the inputs, knowing that data input can be messy. I generally put spaces in my table names, but by omitting spaces from EmployeeIDFilter, I can refer to it in another query without enclosing it within #””.
With the data loaded, it’s time to turn EmployeeIDFIlter into a list. From the transform ribbon, there’s an option to convert to list.
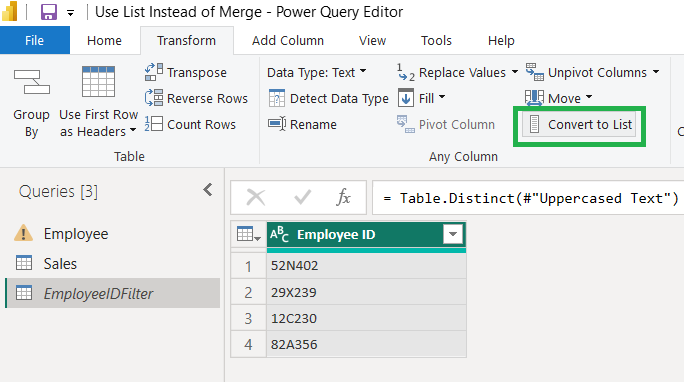
EmployeeIDFilter query is selected. Convert to list is on the transform tab of the ribbon.
Next, we’ll filter the Employee table by the list.

Query editor is on Employee query. Right click on a value in Employee ID column and select Equals to filter by the selected value.
Even though I showing how to do this in M code, I still use the interface to do most of the work. I use the text filters: equals option to filter by selected value. The M code is displayed above the table headers in the formula bar.
Below is the M code generated by the previous action. There’s an ‘each’ keyword followed by the logical test.

Logical test shown is [Employee ID] = “52N402”. This returns the one row in Employee which matches “52N402”
We replace the generated filter with out own. Instead of [Employee ID] = “52N402”, we put List.Contains(EmployeeIDFilter, [Employee ID]. List.Contains checks each row to see if [Employee ID] is in EmployeeIDFilter. If it is, then it keeps that row. In the next image, you can see the formula bar containing this updated formula.
We also want to filter the Sales table. The Sales table doesn’t have the familiar Employee ID column but uses Employee Number instead. To do this, we need a list of Employee Number. In the following image, the Employee Number column in the Employee table is selected. Right click brings up the context menu, where at the bottom, you can select Add as new query. This will add the column as its own query as a list.

Add a list query based on Employee Number column. There are four employees.
On the Sales table, I filter by a single value again to generate the filter by rows M code.

Sales table: selected number filter: equals to filter by selected value
The last step is to replace the generated logical formula with our own.
List.Contains(#”Employee Number”, [Employee Number].
For each row, the Employee Number will be compared to the list of Employee Numbers from the filtered Employee list. Only rows with matching Employee Number will be kept.

Sales table is selected. Formula bar has updated List.Contains formula.
Note that EmployeeIDFilter and Employee Number queries have a list icon and are italicized. Sales and Employee have a table icon.
Eventually, Desktop may get the ability to filter using lists using the interface like Power Query online does. I’ll be glad to see this happen.
Download my solution from GitHub: Filter by List Instead of Merge. It’s fully self-contained with no database connections.